Series |
N/A 311 |
Assembly Type |
N/A Receptacle Bag Assembly |
Altitude/Reduced Pressure Rating |
N/A 70,000 ft. |
Current Rating |
N/A 10 Amp |
Operating Temperature |
N/A -40 to 85 ºC |
Test Voltage |
N/A TBD |
Polarization |
N/A
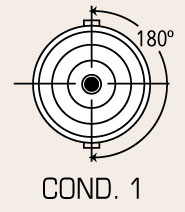 Cond. 1 |
Mating Compatibility |
N/A Mates all Series 311 Cond. 1 receptacles and adaptors. |
Bayonet Coupling Nut Material |
N/A Brass |
Bayonet Coupling Nut Finish |
N/A Nickel |
Coupling Style |
N/A Bayonet |
Panel Mounting Style |
N/A Front Mount |
Panel Mounting Torque |
N/A 36 to 42 in-lbs |
Spring finger grounding |
N/A Yes |
Sealed Receptacle |
N/A Yes |
| Standard/Non-Standard1 | N/A Non-standard Part |
Export Classification |
N/A TBD |
RoHS Compliant |
N/A TBD |
Voltage Rating |
N/A 15 kVDC |
Contact Type |
N/A Male |
Contact Diameter |
N/A 0.052 in1.3 mm |
Contact Material |
N/A Brass |
Contact Finish |
N/A Gold |
|
Step 1 Step 3 | |||||||||||


